This line is critical for LWJGL’s interoperation with GLFW’s OpenGL context, or any context that is managed externally. LWJGL detects the context that is current in the current thread, creates the GLCapabilities instance and makes the OpenGL bindings available for use.
Keyboard input
GLFW divides keyboard input into two categories; key events and character events. Key events relate to actual physical keyboard keys, whereas character events relate to the text that is generated by pressing some of them.
Keys and characters do not map 1:1. A single key press may produce several characters, and a single character may require several keys to produce. This may not be the case on your machine, but your users are likely not all using the same keyboard layout, input method or even operating system as you.
Key Events = which physical key was pressed → use this for game controls (WASD, ESC).
Character Events = which text character was generated → use this for text input (chat boxes, typing).
For keyboard input we can poll the key states with glfwGetKey(window, key) where window is the window handle and key is something like GLFW_KEY_<key> for example GLFW_KEY_W or GLFW_KEY_SPACE, you could also get GLFW_KEY_UNKNOWN if you push a special key like the E-mail key.
With the call to glfwGetKey you will get the key state which is one of GLFW_PRESS and GLFW_RELEASE.For keyboard input we can poll the key states with glfwGetKey(window, key) where window is the window handle and key is something like GLFW_KEY_<key> for example GLFW_KEY_W or GLFW_KEY_SPACE, you could also get GLFW_KEY_UNKNOWN if you push a special key like the E-mail key. With the call to glfwGetKey you will get the key state which is one of GLFW_PRESS and GLFW_RELEASE.
int state = glfwGetKey(window, GLFW_KEY_UP);if (state == GLFW_PRESS) { moveUp();}
But there is a problem with polling, you could miss a pressed key if it gets released before it gets polled, but there’s a simple solution for it, you could just set sticky keys with the help of glfwSetInputMode(window, mode, value).
If we set GLFW_STICKY_KEYS to GLFW_TRUE the key state will be GLFW_PRESS until you poll that key even if it has already been released. It is useful if you only want to know if a key was pressed and it isn’t important in which order the keys where pressed.
假设我们有一个按键 W,如果在某一帧中,用户按下 W 并迅速松开,但在我们轮询之前没有调用事件处理函数,那么正常情况下我们是无法检测到 W 键的 “按下事件”,因为它已经释放了。
但是,如果我们启用了 粘滞键,那么 即使 W 键被松开了,只要它没有被轮询,它的状态仍然会显示为 GLFW_PRESS,直到你进行轮询。
Most of the time polling the input is sufficient, but it is recommended to use callbacks.
Callback
The key callback is invoked when a physical key is pressed or when it gets released, also when it is repeated, we can easily set a key callback via glfwSetKeyCallback(window, cbfun). Normally you would put a function pointer in there, but in Java we don’t have something like that, but luckily LWJGL provides a GLFWKeyCallback class for this. But you need a strong reference to the callback, so that it won’t get garbage collected, so just put a reference like private GLFWKeyCallback keyCallback in your class.
glfwSetKeyCallback(window, keyCallback = new GLFWKeyCallback() { @Override public void invoke(long window, int key, int scancode, int action, int mods) { /* Do something */ }}
Alternatively you could also use lambda expressions because the GLFWKeyCallback provides also a single abstract method (or simply SAM).
Its up to you which version you want to use, but now let’s have a look at the variables. The first two should be clear by now window is the window in which the event was received and key is GLFW_KEY_<key> like before.
The scancode is the system-specific scancode of the key, but you need it only if the key is GLFW_KEY_UNKNOWN.
The state of the key is stored in action which is one of GLFW_PRESS, GLFW_RELEASE or GLFW_REPEAT and finally the mods is a bitfield(位域) of modifier keys that where pressed, it can contain GLFW_MOD_SHIFT, GLFW_MOD_CONTROL, GLFW_MOD_ALT and GLFW_MOD_SUPER.
/** The key or button was released. */public static final int GLFW_RELEASE = 0; /** The key or button was pressed. */public static final int GLFW_PRESS = 1; /** The key was held down until it repeated. */public static final int GLFW_REPEAT = 2;
For example you want to see if Control + Alt + F was pressed you would check it like in the following code.
/** If this bit is set one or more Control keys were held down. */public static final int GLFW_MOD_CONTROL = 0x2; // 0010 二进制/** If this bit is set one or more Alt keys were held down. */public static final int GLFW_MOD_ALT = 0x4; // 0100/** If this bit is set one or more Super keys were held down. */public static final int GLFW_MOD_SUPER = 0x8; // 1000/** If this bit is set one or more Shift keys were held down. */public static final int GLFW_MOD_SHIFT = 0x1; // 0001
int ctrlAlt = GLFW_MOD_ALT | GLFW_MOD_CONTROL; // ctrlAlt = 0110/*0100 or 001001000010----0110*/if ((mods & ctrlAlt) == ctrlAlt && key == GLFW_KEY_F && action == GLFW_PRESS) { System.out.println("Control + Alt + F was pressed!");}// mods & ctrlAlt, 假设 mods = 1111四个键全按下。 1111 & 0110 = 0110
渲染三角形
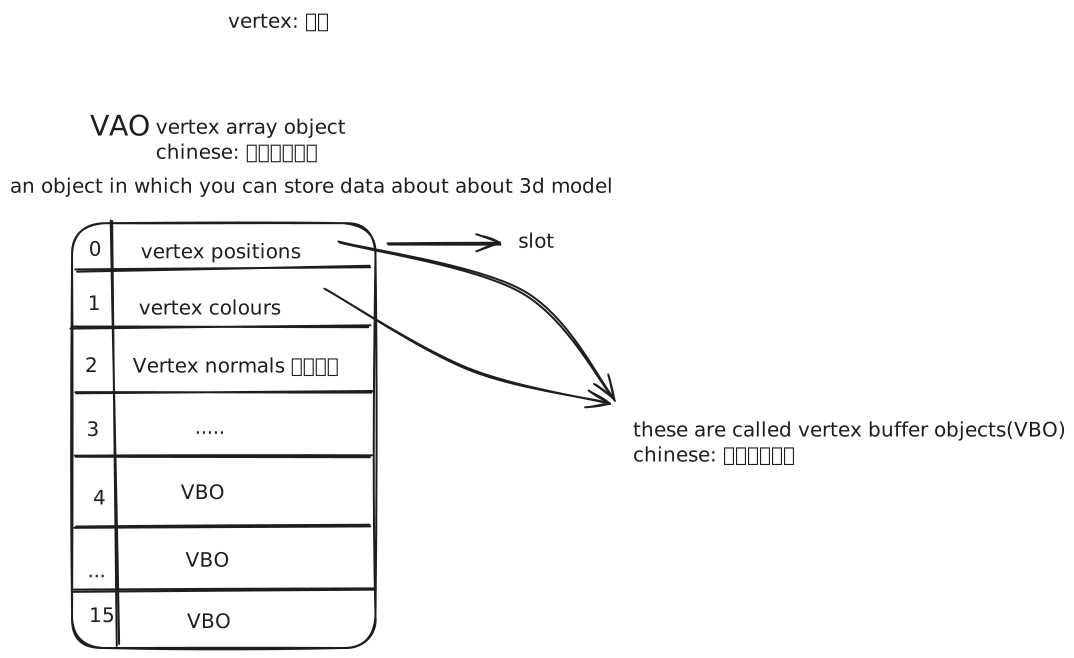
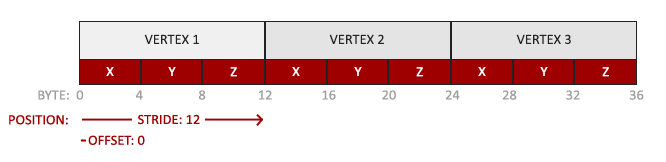
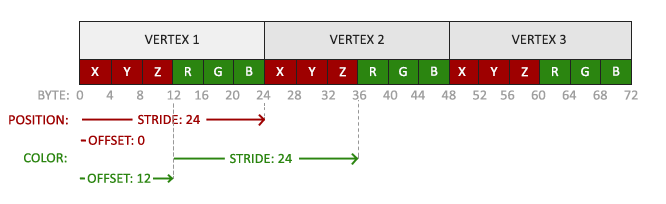
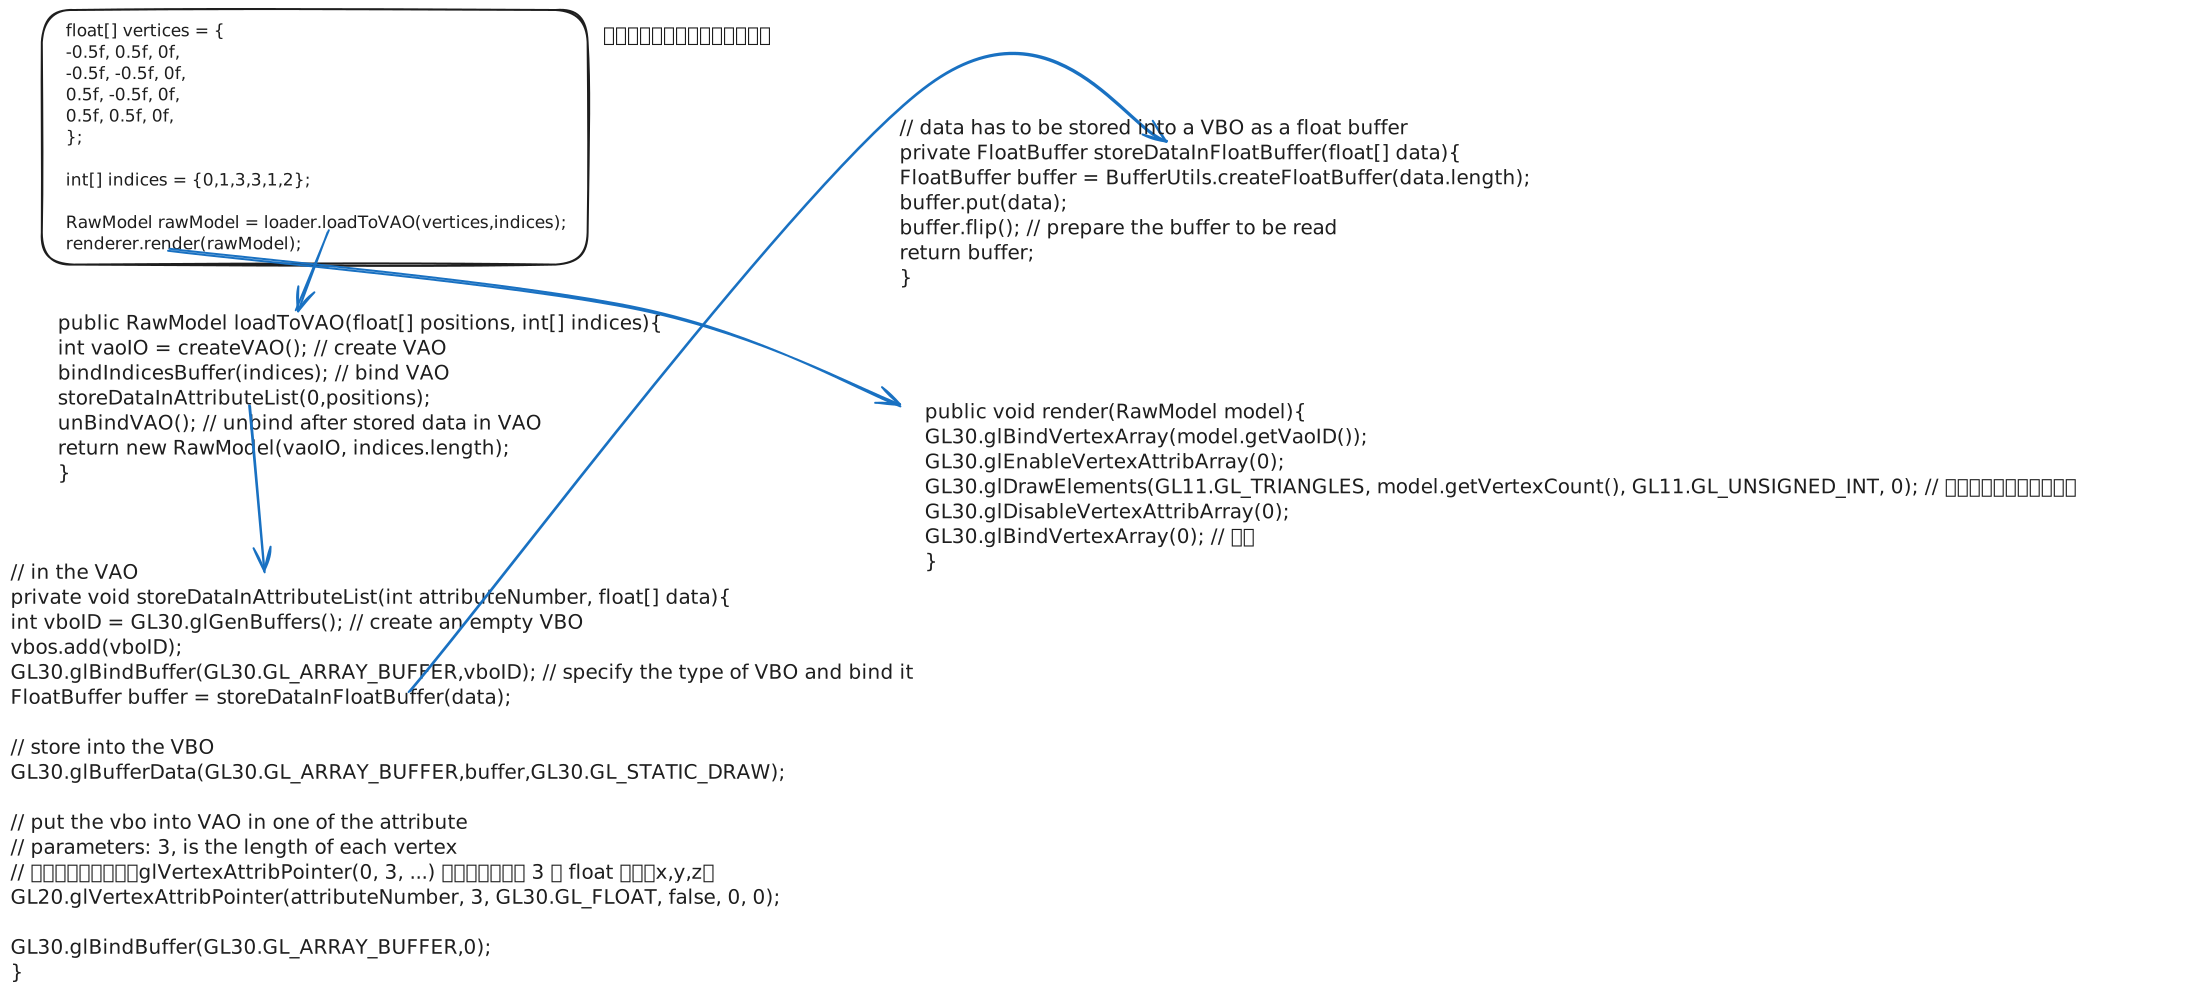
VAO and VBO
顶点数组对象:Vertex Array Object,VAO
顶点缓冲对象:Vertex Buffer Object,VBO
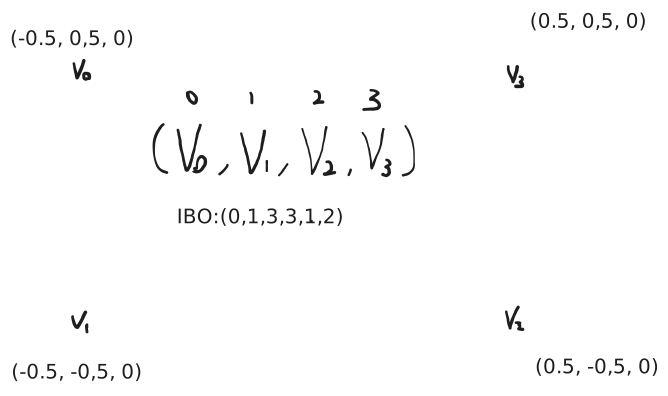
元素缓冲对象:Element Buffer Object,EBO 或 索引缓冲对象 Index Buffer Object,IBO
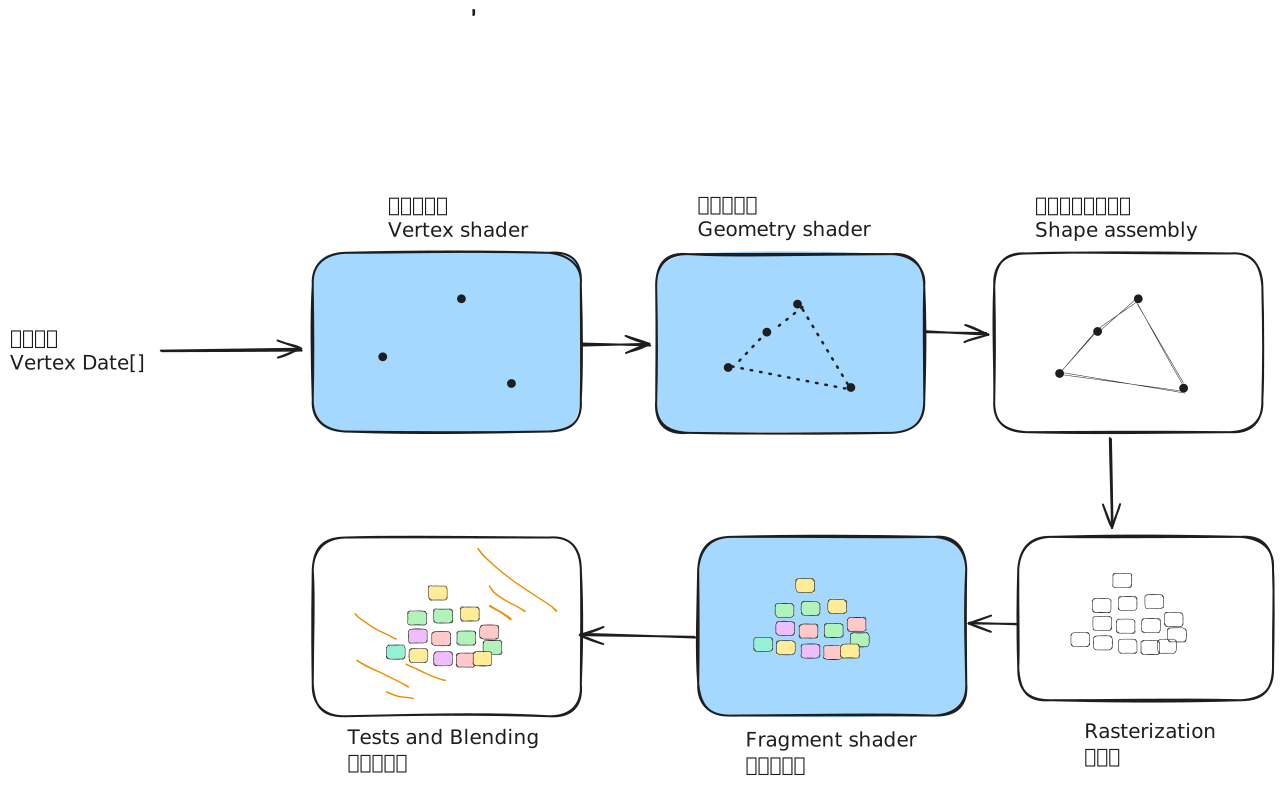
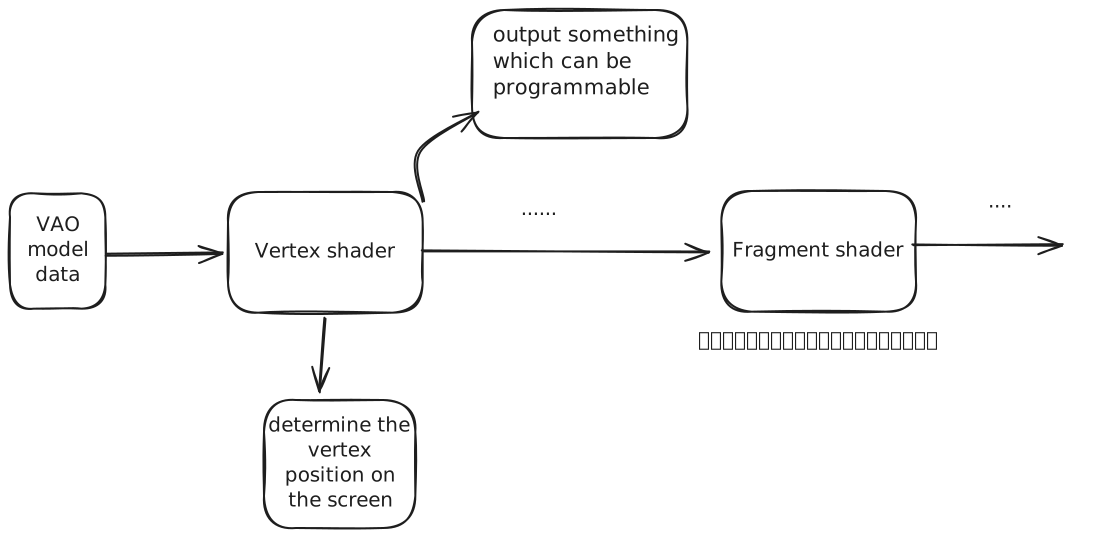
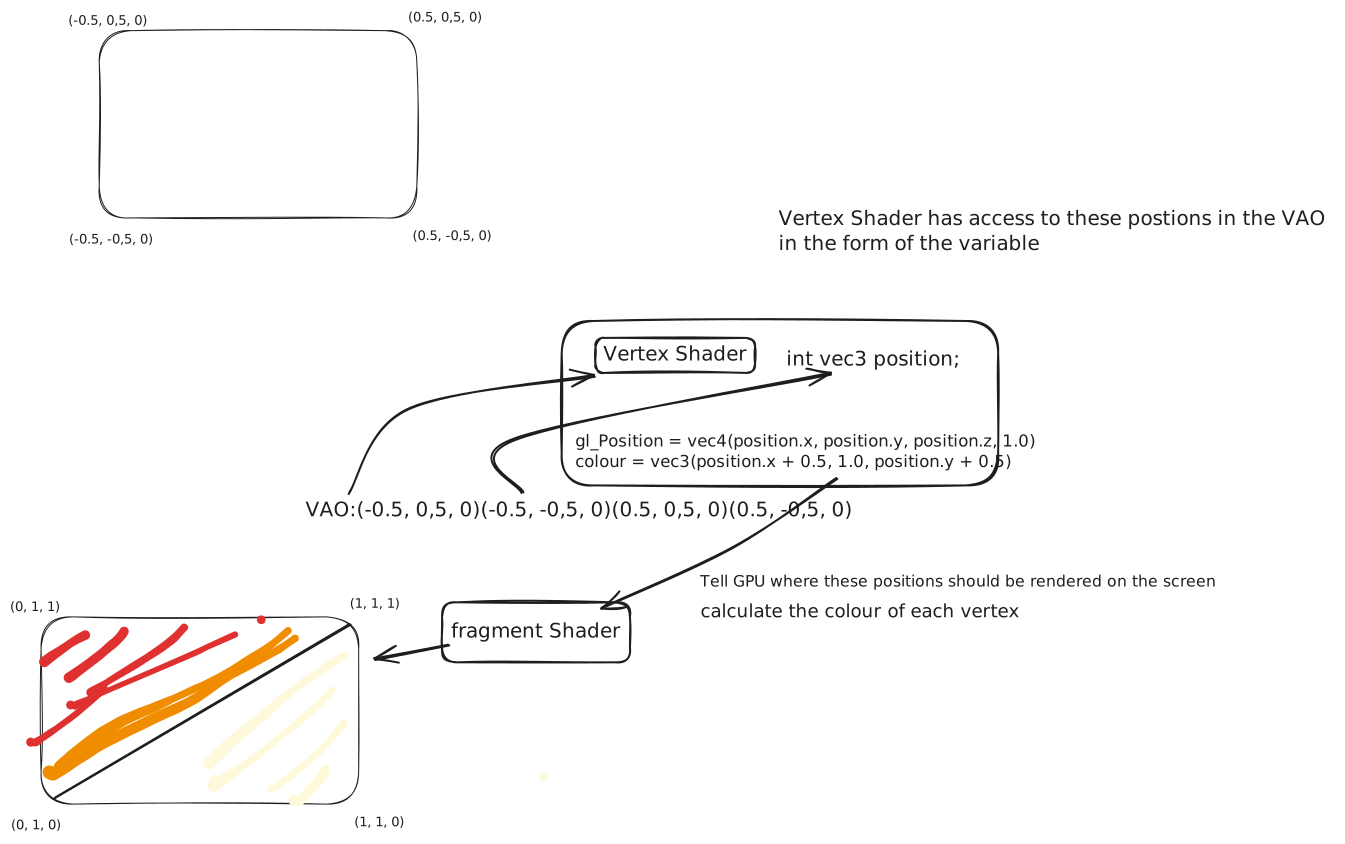
图形渲染管线接受一组3D坐标,然后把它们转变为你屏幕上的有色2D像素输出。图形渲染管线可以被划分为几个阶段,每个阶段将会把前一个阶段的输出作为输入。所有这些阶段都是高度专门化的(它们都有一个特定的函数),并且很容易并行执行。正是由于它们具有并行执行的特性,当今大多数显卡都有成千上万的小处理核心,它们在GPU上为每一个(渲染管线)阶段运行各自的小程序,从而在图形渲染管线中快速处理你的数据。这些小程序叫做着色器(Shader)。
#version version_numberin type in_variable_name;in type in_variable_name;out type out_variable_name;uniform type uniform_name;void main(){ // 处理输入并进行一些图形操作 ... // 输出处理过的结果到输出变量 out_variable_name = weird_stuff_we_processed;}
int nrAttributes;glGetIntegerv(GL_MAX_VERTEX_ATTRIBS, &nrAttributes);std::cout << "Maximum nr of vertex attributes supported: " << nrAttributes << std::endl;
Uniform variables are variables in the Shader code that can be set from our Java code at any time.
Uniform是另一种从我们的应用程序在 CPU 上传递数据到 GPU 上的着色器的方式,但uniform和顶点属性有些不同。首先,uniform是全局的(Global)。全局意味着uniform变量必须在每个着色器程序对象中都是独一无二的,而且它可以被着色器程序的任意着色器在任意阶段访问。第二,无论你把uniform值设置成什么,uniform会一直保存它们的数据,直到它们被重置或更新。
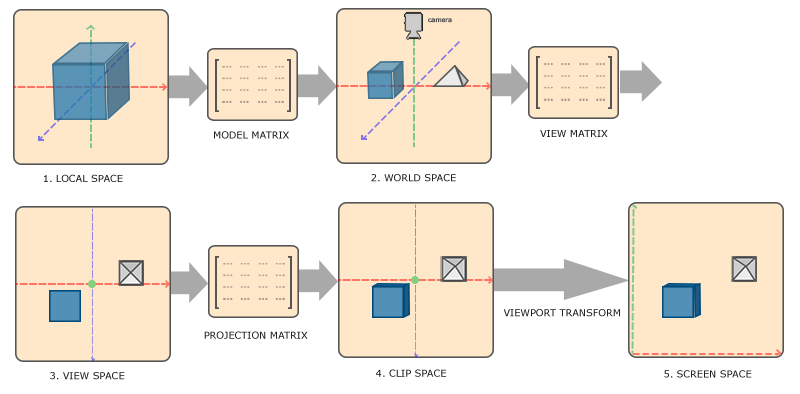
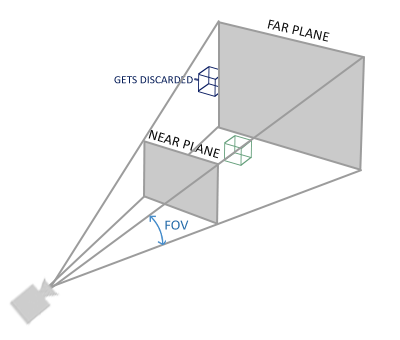
它的第一个参数定义了fov的值,它表示的是视野(Field of View),并且设置了观察空间的大小。如果想要一个真实的观察效果,它的值通常设置为45.0f,但想要一个毁灭战士(DOOM,经典的系列第一人称射c击游戏)风格的结果你可以将其设置一个更大的值。第二个参数设置了宽高比,由视口的宽除以高所得。第三和第四个参数设置了平截头体的近(near)和远(far)平面。我们通常设置近距离为0.1f,而远距离设为100.0f。所有在近平面和远平面内且处于平截头体内的顶点都会被渲染。
near跟far都是正数
当你把透视矩阵的 near 值设置太大时(如10.0f),OpenGL会将靠近摄像机的坐标(在0.0f和10.0f之间)都裁剪掉,这会导致一个你在游戏中很熟悉的视觉效果:在太过靠近一个物体的时候你的视线会直接穿过去。
⚠ Switch to EXCALIDRAW VIEW in the MORE OPTIONS menu of this document. ⚠ You can decompress Drawing data with the command palette: ‘Decompress current Excalidraw file’. For more info check in plugin settings under ‘Saving’
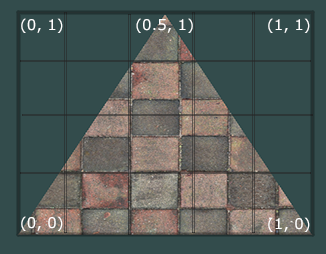
⚠ Switch to EXCALIDRAW VIEW in the MORE OPTIONS menu of this document. ⚠ You can decompress Drawing data with the command palette: ‘Decompress current Excalidraw file’. For more info check in plugin settings under ‘Saving’
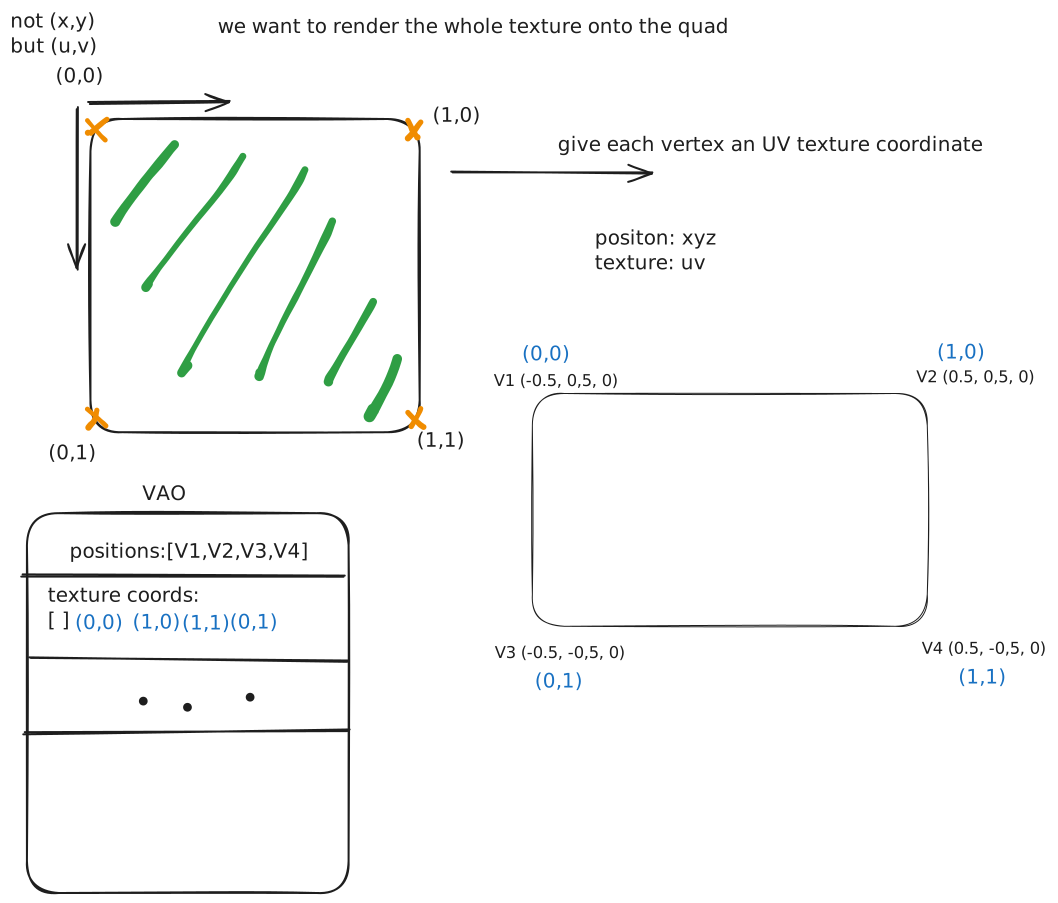
⚠ Switch to EXCALIDRAW VIEW in the MORE OPTIONS menu of this document. ⚠ You can decompress Drawing data with the command palette: ‘Decompress current Excalidraw file’. For more info check in plugin settings under ‘Saving’
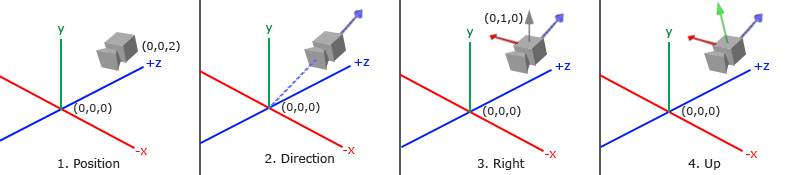
val cameraRight: Vector3f
        get() = Vector3f(cameraFront).cross(worldUp).normalize()
Drawing 2025-09-10 15.37.15.excalidraw 3
⚠ Switch to EXCALIDRAW VIEW in the MORE OPTIONS menu of this document. ⚠ You can decompress Drawing data with the command palette: ‘Decompress current Excalidraw file’. For more info check in plugin settings under ‘Saving’
val cameraUp: Vector3f
        get() = Vector3f(cameraRight).cross(cameraFront).normalize()
Drawing 2025-09-10 15.37.15.excalidraw 4
⚠ Switch to EXCALIDRAW VIEW in the MORE OPTIONS menu of this document. ⚠ You can decompress Drawing data with the command palette: ‘Decompress current Excalidraw file’. For more info check in plugin settings under ‘Saving’